MSN Missile Launcher – Camera Support for Mac 21 April 2008
Posted by David Wilson in USB Missile.Tags: Camera, Launcher, Mac, missile, MSN, usb, Web
1 comment so far
If you’ve got one of the DreamCheeky MSN Missile Launchers (you know the ones that come with the camera on top and would like to get the camera working on your Mac… Here’s how.
 Download the MacCam software from sourceforge. Make sure you get the latest version (I got the CVS build of 2008-03-13). This includes support for the camera (specifically the ZSMC ZS211 USB PC Camera (ZS0211). Actually the camera seems to have come from Vimicro.
Once you have downloaded MacCam, unzip the archive. You will need to manually copy the file maccam.component into the /System/Library/Quicktime folder and copy the MacCam application into your Applications folder.
Plug in the Camera only to a spare USB port and run the MacCam program. You should get a black window with a right pointing triangle in the top of the window. This is for “Play”. Press it. You should now see web camera images on the screen.
If you’ve got this far and it’s all working… you can now use the “Missile Camera” with the USB Missile Launcher NZ software. It will be automatically detected and if you open the video window, the onscreen target will be what the camera sees.
The additional good news here is that now you have the camera working, it also works with Skype. No fiddling or configuration changes are required.
If you are using a machine that also has a built in iSight, you will need to alter the video settings in USB Missile Launcher NZ so that the source for video input is the USB Web Camera mounted on the Missile Launcher.
Good Luck. Happy shooting!
DreamCheeky MSN Launcher Review 8 April 2008
Posted by David Wilson in USB Missile.Tags: USB Missile DreamCheeky MSN Review
add a comment
With much anticipation I awaited the arrival of my 7th USB Missile Launcher, or was that 5th – I’ve lost count. What I was keen to confirm was if my Mac software, USB Missile Launcher NZ, would drive the launcher or if I needed to make coding changes. So first onto the unboxing.

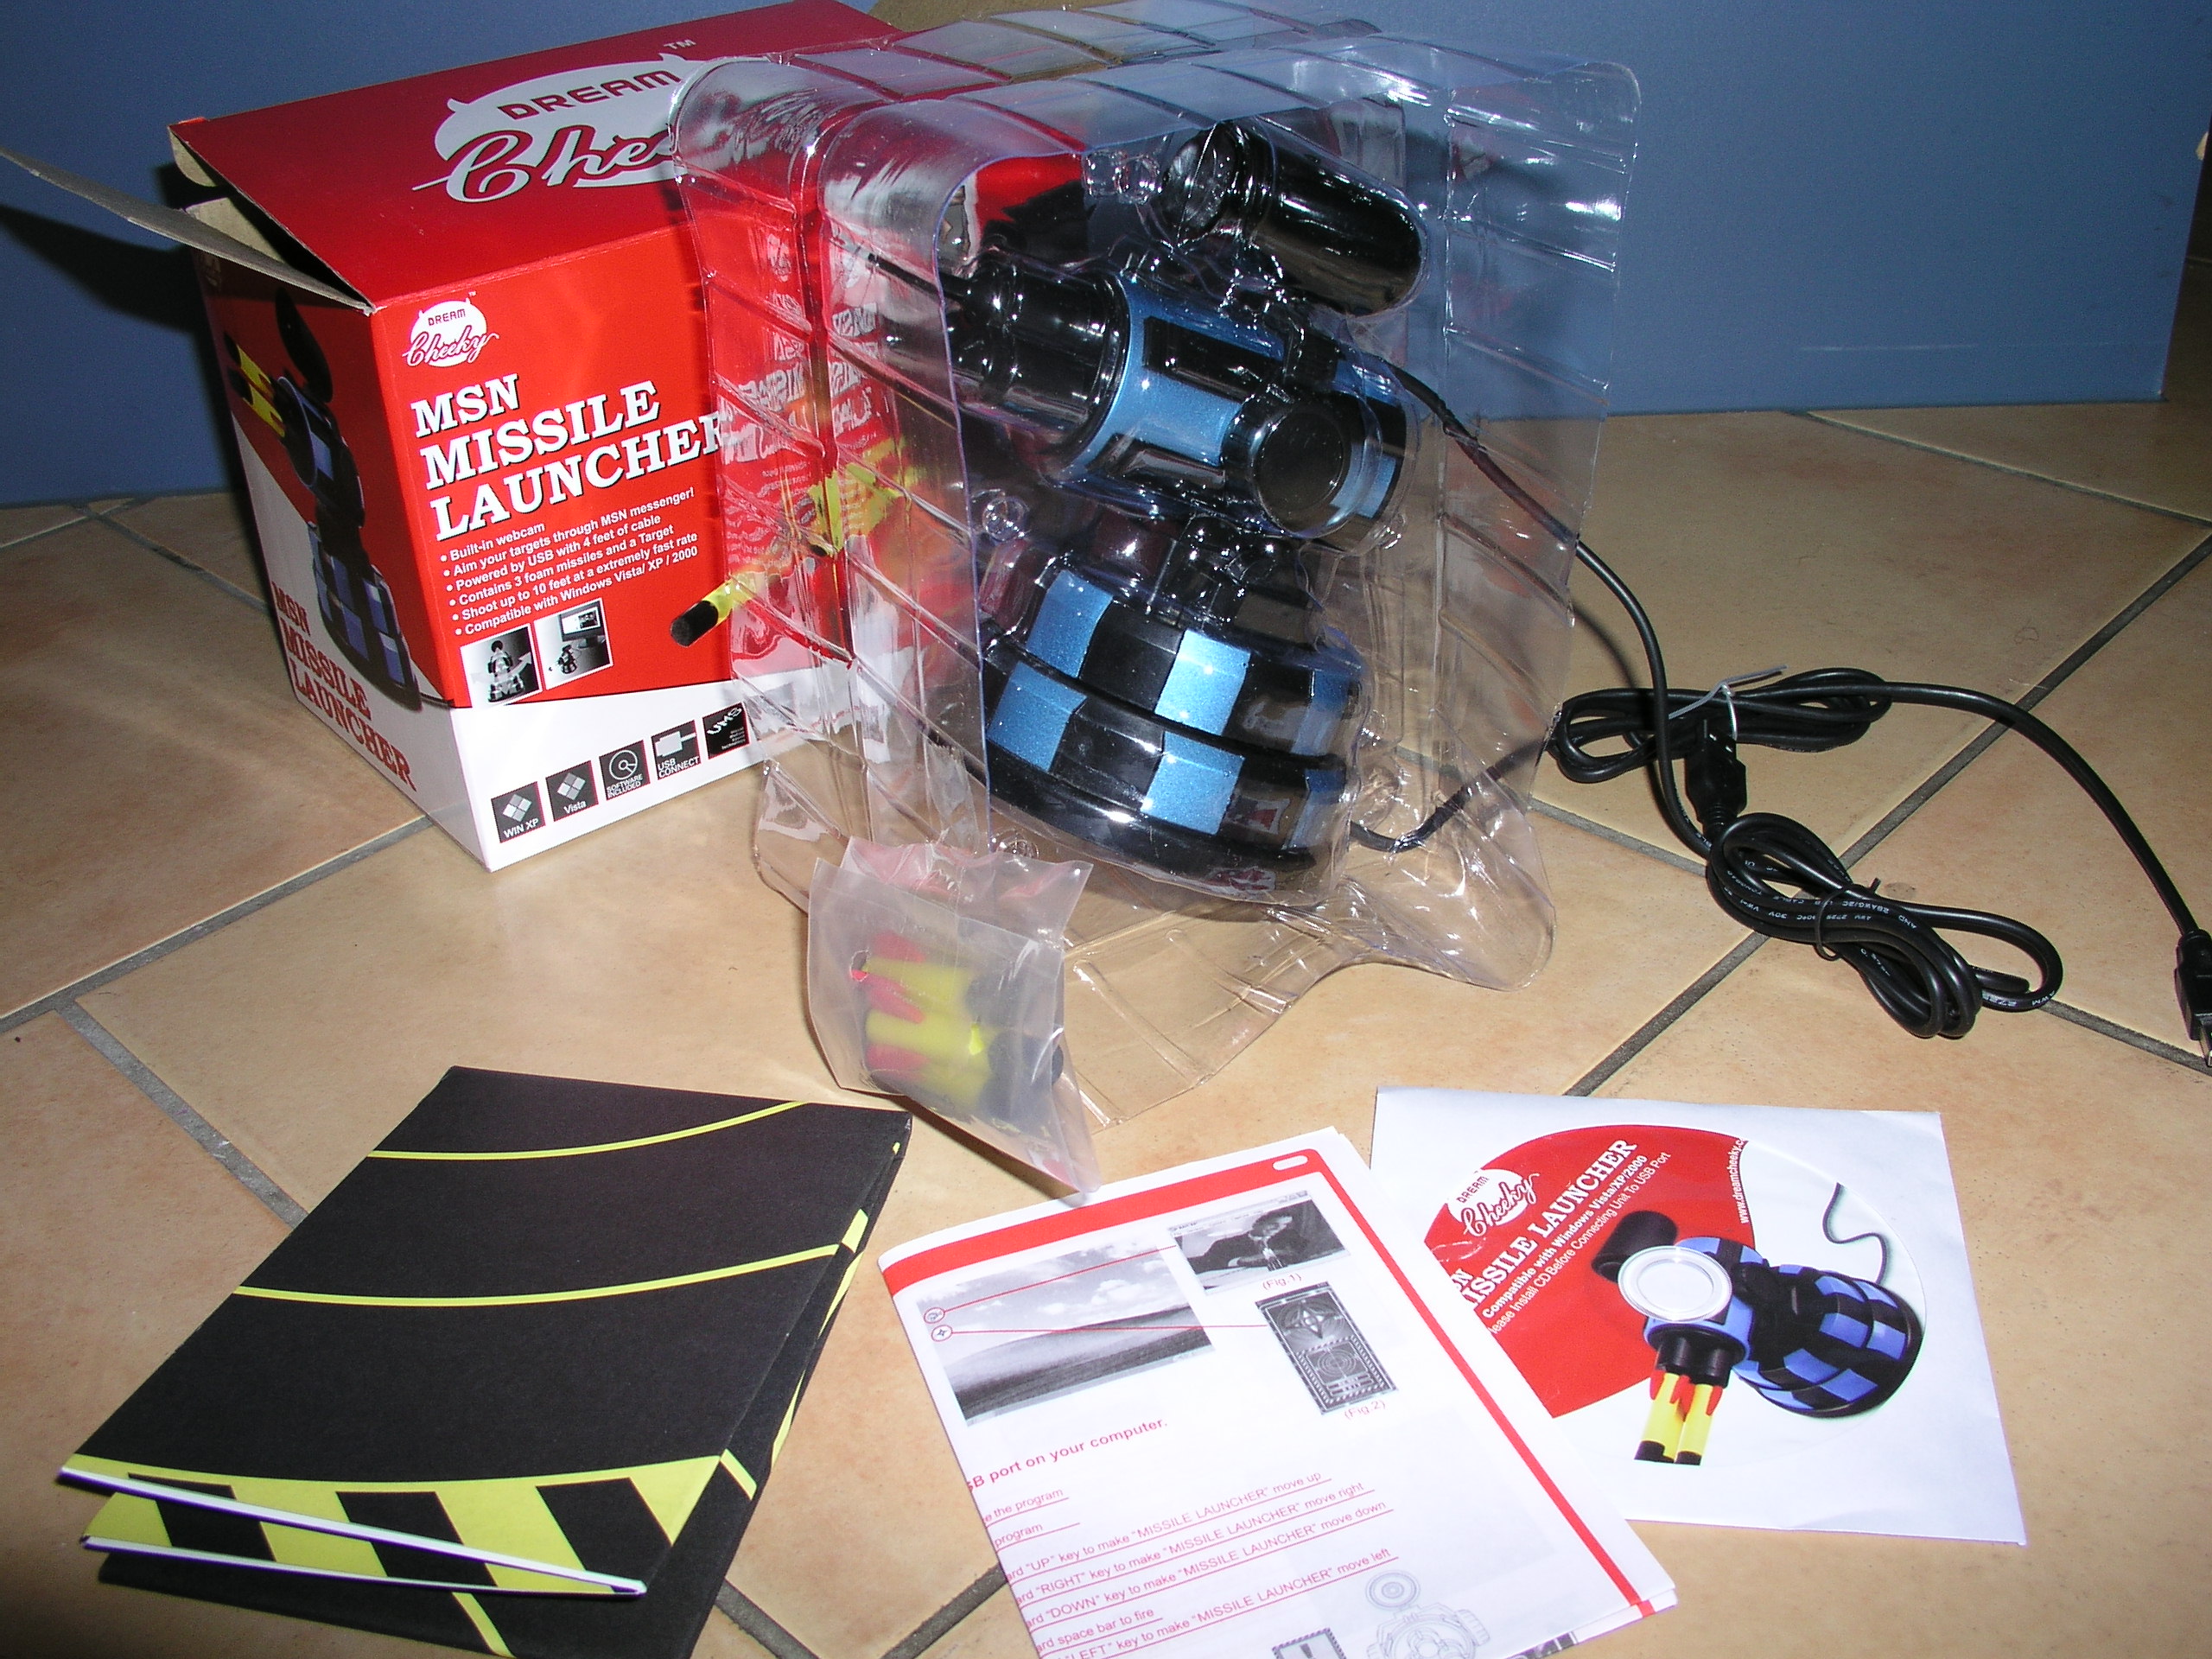

In the box are: 1 x Launcher, 3 x nurf missiles, giant Target, instructions, and installation CD. This is the first launcher that I have received that has 4 pages of instructions.
The first two pages of instructions guide you through the installation of the windows software noting that the software must be installed before connecting the launcher to the USB port(s) on your computer. There is a special note that says “Using an external USB HUB or docking station may result in the loss of power to the MSN missile launcher. The unit may not work properly”. I suspect that this is because the devices do not supply their own power, they draw it from the computer and connecting the devices to one USB port may cause an issue. My recommendation is that you use this unit with a powered USB Hub.
The outstanding key difference between the MSN missile launcher and its predecessors the USB missile launcher are that this one comes with a USB Camera (web cam) mounted very nicely on top of the launcher. This web cam is separately and thus has it’s own USB connection to the computer. So, that’s one USB connection for the web camera and one USB connection for the missile launcher.
How easy is the MSN missile launcher to set up? Well I gave the missile launcher to my 10 year old and asked him to set it up on his Windows XP machine (I didn’t give him the supplied documentation). He had it all up and running within 10 minutes or so after installing the software, and he even asked me for a USB Hub. I was impressed.
He ran up the missile launcher software and has been firing missiles at me, with great joy, all afternoon. There is a separate application to run to get the camera view from the camera on top of the missile launcher. And you can manually press a button on top of the camera to get a freeze frame picture. The web camera has a ZS211 IC in it, so I thought a little experiment was in order – I can confirm that the camera does work with Skype. And it works really well. Now I particularly like the design of the web camera and launcher fitting. It is easily interchangeable between the MSN Missile Launcher and any of its older family members.
If you’re into MSN there is one and a half pages of instructions on how to install and use the missile launcher through the MSN service.
Back on the Mac the internals of the missile launcher are the same as the “Rocket Baby” – the previous USB missile launcher (green one). This means that the USB Missile Launcher NZ software simply just works. I have not yet been able to get it working with the camera and will issue a new release of the software if needed or instruction on what you need to do to get the camera working on the Mac.
PROS
Works with existing Mac software (aka RocketBaby)
Camera mount is great camera works well with Windows
MSN integration is unique
CONS
Windows software still the same
Not easily able to integrate Camera support on the Mac (yet)
May need a powered USB hub if you’re running short on USB ports
SUMMARY
I like this new launcher and the slick camera integration. I admit to being somewhat surprised to see two USB leads for the device, though it is actually devices and makes software implementation very easy. It also means you can use the camera as a web camera and its already mounted. Nice implementation DreamCheeky, can we get an ICMB integrated with Google Maps next? 😉
Airport Extreme – home or user directories 3 April 2008
Posted by David Wilson in Uncategorized.Tags: Airport Extreme Base Station User Accounts USB Disk Mul
add a comment
I’ve got 2 x USB hard drives connected to my AEBS and the Airport has disk sharing configured with user accounts.
I found an issue the other week… I thought I’d backed up my data to my “personal drive” on the AEBS… only now the drive had nothing in it!
Turns out that the AEBS (had been restarted at some point) and was now presenting my personal drive off the “other” hard drive…
I’ve been searching for an explanation on this tonight and while I’ve not been able to find anything on the web, I eventually ran help in the Airport Utility
AirPort Extreme (802.11n): Using an attached USB storage device as a home directory is not recommended
You should not use a USB storage device connected to an AirPort Extreme (802.11n) base station as a home directory. An AirPort Extreme (802.11n) base station may not be able to locate a home directory on an attached USB device if it is powered off or if the enumeration order of attached storage devices changes.
Article: 305013
http://docs.info.apple.com/article.html?artnum=305013
So… if it’s not recommended to set up the AEBS in this way, why allow the option in the configuration? Oh and how many people are going to understand what the word enumeration means anyway?

